Friday, May 28, 2010

Happy Friday!

Hello and Happy Friday to you!

Here are a few projects that I have created recently. Thought I would share. I also want to wish you a sunny and fantastic Memorial Day weekend.


This layout is for an upcoming challenge over at SSC! I was making a sample for one of the groups there. The twist is to make a hand made flower and incorporate it on your layout. I made 2 styles. The light pink at the top right is felt strips gathered together at the center. Cover with a button and fill in the holes with brads. The double stacked flower on the bottom left is adhesive backed felt cut with the Sizzix machine. It was fun! The light on the first picture below is so bright, sorry about that.


Close up to show ribbon strips and the Sizzix double daisy flower. I love the acetate frame on top of the photo. I can't get enough of these lately!
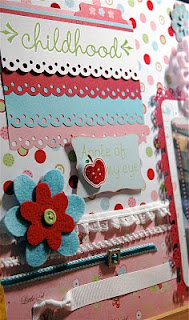
This light pink felt material flower is soo soft. I can't wait to find more colors. Can you see my little lady bug frame...walking around the edge?! Love that! Looove my Martha Punches!!!


Above is a full shot of a pennant/banner I made for my daughter's room. "Theadora" Below is a close up view to show the details of the banner. I added charms she had acquired over time and pieces from broken bracelets. I mounted patterned paper-(Cosmo Cricket -"Ducks in a Row" ) over chipboard triangular pieces. I used my Crop a Dile to punch the holes. That thing is a monster-love how I don't have to hammer anymore!

"Island Escape"
Embossed background with Cuttlebug swirls folder. This card was created for the Paper Scraps challenge over at SSC. I die cut (Cricut) the chair in a solid piece (Life's a Beach cart) then covered it with additional glittery scrap strips. The umbrella was cut with my Sizzix.


"You are my sunshine"
Not much complication going on here. Flowers are cut out of random material with my good ol' handy Sizzix. I love this machine...still! The best part about this card for me, is the metal edge. I found it at AC Moore. It's by 7 gypsies. I love it! Talk about easy to use or what? They come "adhesived" already! So far so good-it stayed put right on top of the fabric too. Two 10" or 8" strips to a package for I think under $6-. I am saving the other for a paper mini book I'll be making soon.

Don't forget to click on the images to see them bigger.

Tuesday, May 18, 2010

Mini Book

Hello and happy Tuesday to you : )

Thought I would share a mini book I made. My husband and I stopped at AC Moore last week on our way home from the doctor. I needed to be cheered up after finding out I have yet another herniation in my neck. Not good news but it was a fun shopping trip!

I never really bought 7 Gypsies stuff before. I went looking for the Tim Holtz Texture plates. I can't seem to get my hands on them : ( They had unopened boxes ALL over the place. I was almost going to offer to unload them so I could find what I wanted!

On my way out I saw a display with a mini book hanging off the rack. It must have been created by staff or by the gypsies! This fabulous crystal ball handle jumped out at me. I just fell in love immediately!!!

This is what I did with it. Hope you like it : )

Front Cover


This view really shows off the crystal ball knob and the height of the album


Chipboard Shape covers are by Teresa Collins. I assembled them with my Bind-It-All.
Front and Back covers have Deja Views "Botanical" paper on them. Every inside page edge has ribbon and a decorative floral brad on them by Close To My Heart.
Peek a boo window on inside cover matted on black Deja Views Botanical. I punched the oval shape out (to resemble a window) with my EK Success punch. I added a strip of white "vintagey" floral ribbon on top.


Pink rhinestones in flower centers-so pretty!! Another tag can be tucked away for private journaling inside the black paper strip.


Vertical decorative strip is adhered directly to page so photos must be directly applied over this or just journaling on the page directly would work too!


On this page I made a horizontal pocket with a tag tucked in to journal on. It's finished off with ornate white trim.


Inside back page
All of the inside pages are (4.5x6.5) made with "The Luxury Stack" by DCWV. They have a pearly smooth finish. So elegant!! White organza ribbon is tied to the wires on the outside of the album.


Hope you enjoyed the pictures and don't forget, to see a better/bigger view just click on the pictures to enlarge them.

{{{Jenn}}}

Friday, May 14, 2010


Happy Friday !!!

Thought I would share a bunch of random projects with you.

I made most of these for the SSC (Simply Scrapping Crafts) challenges. By the way, I am no longer on the Design Team there. I recently found out I have another herniated disc in my neck. Next Thursday I have an appointment with my spine surgeon. This herniation is pressing on the nerve root at C6-7, which is causing me serious pain. The amount of pain pills I am on is just crazy and the crazier part is that the pain is coming right through. There aren't many options besides surgery at this point. I already had 2 surgeries on my neck. The two levels above are fused solid. This one is below my last fusion.

It's pretty scary.

I love crafting and creating but when I sit at the computer it kills me. When I stand and try to create it hurts so much lately. The location of this herniation directly relates to the left arm. My arm is almost completely dead. The feeling is like a hot spear going through my shoulder and radiating down my arm. Ouch! The pills I'm on make me really dizzy and loopy to say the least! I cannot commit to the team in this state. I'm very, very sad about it. When I was asked to join the team I met some awesome ladies and hopefully we stay connected even though I am not on the team anymore. Occasionally, I hope to play along with the challenges when I can and I hope you do too! They are really coming up with some awesome new challenges over there. Check them out so you don't miss out!!! Prizes will be given out too!!

Anyhow, this is what I created before I started to feel really bad.

Thanks for checking it out : )


"Wacky Wednesday" challenge is going on right now at SSC! Check out all the awesome samples made by the DT. My take was using circle and scallop backgrounds to create a repeated shape on my card. I made flowers because they are my favorite happy thing! gerbera daisies and shasta daisies just make me smile. They are happy perky flowers! The patterned paper used here is October Afternoon- "Farm Fresh" Looove this line!!!


The layout above was created for an SSC die cut challenge. The Die Cut / Punch group was removed on the site due to the lack of participants. I was shocked and very disappointed to hear that. I know there are a ton of Cricut (die cut / punch) lovers out there and on the site but not too many entered their creations to the site. That's too bad we didn't get to see them.
The theme for this challenge was Disney. Make a card or layout using your favorite Disney character following the sketch provided. I made Belle from Beauty and the Beast. It reminds me of my daughter and I love the movie. I saw the play many years ago and it was fantastic!
I cut her profile "icon" out in black and added black MS glitter to it for the bling factor!


This is my daughter's favorite thing! SHOES! She has had an obsession for shoes since she was a baby! I guess I am the one responsible for that!!! Ok, I'll admit, I do too!! This was created with the Paisley cartridge and cut on my Cricut. I had a sheet of embossed hearts to use as the background. This will go in her room. She loves it!


I am no pro at coloring that is for sure! This card was also created for an SSC challenge group called "Stamp n Scrap" I love this group. I should have really used a different image but she is soooo fun! It's Wineabella! It's just a fun stamp and I am not entering any contest with her but I sure had fun coloring her! It relaxed me and brought out the kid in me! : )


This card was created for an SSC challenge. Use circles in the way I have. Fold them in on both sides and place them closely side by side. It was something they had for NSD. It came out cute I think! It was really fun to do something different like this with plain ol' circles don't ya think?
The paper I used for this is g.c.d. Have you ever used their paper? Oh my!!! I found them on clearance at Michaels-I want to save them and never cut them up because they are sooo cool and beautiful! I didn't even realize the lines of paper they have-extensive!

Well, that is all for now.

I hope I hear from you and have a wonderful weekend.

{{{Hugs}}}}

Jenn

Monday, May 10, 2010

Chance to win good stuff!

Good morning and happy Monday!!!!

I just found this in my inbox and thought I would share!

If you want some awesome inspiration and a chance to win some goodies check out this blog!
Gramma's House of Cards I have followed her for quite some time now. Sharon colors like a pro and I just admire her creations. I have not yet experimented with Copics, but will one day soon! This is an awesome opportunity to win a fabulous package so hurry and check out the prize. Don't forget to leave her a comment and link it up to your blog for a chance to win!!!

Friday, April 30, 2010

Safari Gift Set


These onesies are soo cute! I got such a kick out of the sayings on them-click on them to enlarge the image : )
Here are the wrapped packages ready to ship! Hopefully she is pleasantly surprised with the gifts!
Here are the onesies rolled, tied with blue gingham and prewrapped.

The box front cover. I made a raised jelly frame so she can insert a picture of baby in when he's born!
I covered the inside of the box with a coordinating sheet of safari patterned paper. I tied each stack of cards with navy satin ribbon to match the nursery colors. Inside has 22 safari themed note cards, envelopes,mini brag book (pics below), a baby boy mini box for a lock of hair or a "first tooth," and I stuck a yellow rubber ducky in the box after I tied a blue bow on his neck,of course!
"Chomp" I am so lucky my kids collect Webkinz because I was able to find coordinating safari plush props to go with my cards! Fun!
Hippo!
This is the mini brag book I made. It only has a couple of pages to show off a few favorites. This would be great to throw in the diaper bag and carry around to brag in a fashionable way!!! This would even make a great gift for dad to take to work and put on his desk. How about sending one to grandma? Oh the possibilities are endless!
inside front cover-I made a plain square frame with my Sizzix die.
page 2 & back cover inside. Another couple spots to put that adorable face!
Back cover.
Originally I made this as the card I was going to give them,but instead I left it blank so they could either use it in his room as a frame or fill in something they would like to write to him.
Here is what the inside looks like. Perfect for a photo or a letter from mommy and daddy.
Croc card with a an epoxy brad.
Elephants.
Monkey! I love this one!
Wild Thing.
Monkey Business
Walk on the Wild Side
Roar
Roar. I noticed on one of my newest cartridges "Once Upon a Princess" there are a ton of frames to cut out on here! They are almost identical to the Spellbinders Nestabilities that I have been purchasing. Ok, so I can't emboss the outer edge but I can still get the general shape! Oh my, my I cannot even tell you how happy this made me!
Safari
Eee Eee! Chomp! Roar!
I am uploading a couple different views because I didn't like the way they were coming out! SO you can see all my shots!
One of the girls in the family is having a baby boy! The nursery theme is "Safari," so I made some keepsake stuff for mom and baby using safari themed papers. Hope they like it!

I originally had planned on making her an 8x8 baby book but with everything going on with my neck I couldn't produce it with all my pain. I would make one card go stand up. Eat coem back in an hour make another. It's been fun but painful! Once again I come back to card making. Fast easy and so versatile. You can go so far with just a little piece of paper! I love all the "Wild" elements I had on hand to coordinate it all.

The keepsake box is from CTMH. These are the best boxes ever! I am surely ordering more of these. The quality is just so great. Super sturdy and easy to cover. Love that!!!

DCWV -Safari Kids Stack was perfect for the decor. I bought all the coordinating embellishments to go with the slab. Boy Rub-ons(glittered),Boy Saying Pop-ups(foiled),and Brads.

Thanks for checking out my "Wild" post!

Friday, April 23, 2010

Another Die Cut Challenge at SSC

"It is Christmas in the heart that puts Christmas in the air." ~W.T. Ellis

This has to be one of my favorite groups (challenges) EVER! I'm one of the leaders for this group and I look forward to each and every theme that goes up! It's SSC that I am referring to. If you have not joined yet you are missing out! The Die Cut / Punch Group has posted the 2nd challenge for April, so hurry and check it out! Submit your project and you just might win some RAK at the end of the month! The theme this week is Holiday. The other leader Teresa chose Christmas as her favorite! To participate all you have to do is make a Christmas (Hanuka etc.) project,card or layout using at least one tree and a quote.

Hope what I made inspired you enough to play along!!! : )

Wait until you see what the other design team girls made for their samples-ooh!

Materials Used:
Background paper is White Wash Collection by Core'dinations-embossed with Winter Bundle-Flurries using my Cuttlebug(sanded with a mini file to reveal blue color);,Cardinal Snow embossed and hand cut then layered on top of 2nd layer-raised with 3D foam squares;Trees cut from Joys of the Season-Cricut cart,glittered with Martha Stewart Arctic glitter crystal fine;Blue organza ribbon,clear tag and mini rhinestones from CTMH;white jute from Walmart; ;Christmas quote found online

Thursday, April 22, 2010

A few new projects to share

This wreath project was fun! It is the current theme chosen from SSC (Simply Scrapping Crafts)- Altered / Home Decor Group. This week Rebecca chose to use wreaths as the project base. I made mine out of paper cut from the Home Decor cart. I wanted a delicate look and something I could actually use in my home. I think it would be perfect in a baby's nursery hanging in the window or on a wall. Don't you? So springy and light! If your decor is victorian or cottage style this would go great! I used fishing line to barely be visible for the little flowers hanging in the wreath centers. Add a few rhinestones and voila! Instant pretty!
You should see some of the other DT samples. If you decide to go to SSC just join the group as a member then go check out the tons of inspiration projects there! Don't forget to mention I sent you!


The Pansy layout is also part of a challenge that is going on at SSC. This is from the Card/Stamping Weekly group. There was an inspiration photo provided this week and here is my interpretation of it. Pansy's were one of my mom's favorite flowers. This is dedicated to her and for her love of gardening. Every spring she would come to my house and get me started on planting -pansy's first! The kids always looked forward to planting with Gram. Getting dirty was always fun! The best part for me was she would clean them up and I didn't have to! I just got to take amazing photos of them in action and I reaped the benefits later because my garden looked amazing when it bloomed! The first picture is not great to showcase my project but I wanted to show off my real potted pansy's that I planted with my children in honor of my mother. I am so proud they are still thriving!

In the photo on the bottom right if you notice there are clocks clustered together (Making Memories-Flea Market) they all have sayings on them that remind me of her.
They are: Time Flies,Timeless Beauty and Timeless Adventures.
The wrought Iron gate (Martha Stewart punch)at the bottom is a classic look. My mom loved classics. She was a classic! Doilies go way back to her decorating days and me thinking they were old lady-ish :) Now I collect them. Go figure! The pot I made is supposed to look like ceramic with a patina finish. Well, I tried to anyway! It's cardboard stripped to show the corrugated lines in the middle. I painted it first with white to cover it a solid lighter background. Then I painted it with a teal aqua-ish color. Next, I applied a metallic rub on finish to it in copper/bronze color. I hand cut it to resemble a traditional planter shape. The butterfly brad is interesting . There is an interesting thing I found out when researching Butterflies for my daughters science project.
The ancient Greeks called butterflies "Psyche" which also means "soul." Many cultures feel that when we die our souls go to heaven as butterflies. I was so touched by this now I am all about the butterflies on my projects. I try to incorporate a little mom into everything I make!
Th corner scrolls are cut from the Heritage Cart at 3 " Lots of pop dots used to show dimension here.


"Favorites" is a challenge that is going on at SSC. The challenge is to use accordian folded paper. I decided to make my project a dress! The patterned paper is October Afternoon-Ducks in a Row: Sleep Tight. I had embossed cards I bought from Micheals that I mounted it on. I'm sorry but I do not remember where the 3D embellies ae from. They are so summery I wish I was at the beach right now in that dress! I cut the dress from the Paisley cart as well.


For the love of Shoes! This is for my daughter! It's all about shoes for her : ) I made this shadow box style layout to put in her room. I used the Paisley Cart on my Cricut. The background paper is embossed baby hearts to keep with the "love" theme!

Well, I hope this post leaves you with lots of possibilities for creating new projects!!! I' d love to see some of your creations. Happy Thursday : )